

The Complete Guide to Building Your Indoor Golf Simulator (2025 Edition)

If only there were a way for you to practice your golf swing, no matter what the weather is like outside.
With an indoor golf setup, this wish becomes a reality.
It’s also a way to personalize your workspace such that you can enhance your skillset 365 days a year.
In this guide, we will share with you everything you need to know to build your own indoor golf sanctuary. We’ll walk through every step in detail, from the parts you’ll need to available space, choosing the right equipment, calibrating your system, and maintaining it over time.
Let’s get started.
Why Go Indoor?
The reason for going indoors goes beyond simply escaping the elements, as the appeal for indoor golfing.
There are a number of benefits it can bring that will not only help with your practice but help you enjoy the game a lot more.
Year-Round Practice
The biggest benefit of having an indoor golf setup is the ability to practice year-round. Freezing temperatures, pouring rain, scorching sun? None of this will prevent you from working on your swing.
This consistency is essential for evolution. Rather than waiting for favorable weather for months on end, you can stay sharp and ready for your next round out on the course.
Convenience
Consider the amount of time spent going to a driving range or golf course. With an indoor situation, the commute is no longer necessary. Your practice facility is only a few steps away, meaning you can sneak in quick sessions whenever you have just a few minutes. There’s no need to reserve — or wait — for tee times; your schedule can be completely yours.
Realistic Simulation with Advanced Technology
Indoor golf systems have come a long way and are able to simulate the experience of playing on real course property very accurately.
High-tech launch monitors and simulators use cameras, sensors and algorithms to track everything about your shot, from ball speed and spin rate to trajectory and distance.
Combined with high-definition visuals, the systems let you play virtual rounds at world-famous courses like Pebble Beach or Augusta National. The result is an experience that feels surprisingly immersive and authentic.
Cost Savings Over Time
For those who want to improve their game, investing in an indoor golf setup can be a tremendous return on investment because it allows you to hit the links as much as you want without the costs of greens fees.
Think about the expenses it incurs to go to the driving range multiple times a week, to pay membership dues at private clubs, to take lessons from professional teachers. Practicing at home lowers those expenses, while allowing you the flexibility to work on your game whenever you want.
Customization for Your Needs
An indoor golf setup provides you with the means to customize your practice to meet your individual needs. Whether you want to concentrate on full-swing mechanics, hone your short game or practice for competitive rounds, you can create an area that will accommodate your priorities. It's a great way to ensure that every practice session can be productive and enjoyable.
Given these benefits, it’s no surprise that indoor setups are becoming increasingly popular among golfers. But before you start buying equipment, there’s a crucial first step: mapping your space out.
How Do You Start to Plan Your Indoor Golf Space?

Once you decide to build an indoor golf set up, the first thing is to develop an effective indoor golf plan. You will be limited in the equipment you can accommodate, as well as the comfort of your practice sessions. Here’s how to evaluate and organize your space for peak efficiency.
Assess Available Space
We start by measuring the size of your potential golfing area. Not every room or nook of your house is going to work equally well for this.” Take into account the next factors:
Dimensions
Be sure to measure the length, width, and height of the space you’re interested in. You need at least 10-15 feet of depth for a full swing for most indoor golf options. For width, you'll need around 12-15 feet, especially if this setup is going to cater to both right and left-handed golfers. If your space isn’t as big, you may need to shift gears in terms of your plans — emphasize short-game practice rather than full swings, for example.
Ceiling Height
Another key consideration is ceiling height. Low ceilings can disrupt your swing — and threaten your clubs. You want at least 9–10 ft of clearance for full motion, but if you’re constrained, you might be able to make it work with 8ft (if you have a flat swing and or are shorter than average). Generally, higher ceilings offer more flexibility, particularly if you intend to use ceiling-mounted projectors or screens.
Available Space
Choose if you are going to make the golf room solely dedicated to golf, or whether you want to use the room for other things. A dedicated room gives you the most flexibility; a shared space can work if it’s organized well. You must remember that if your space is cluttered, you will be prevented from practising freely.
Design and Layout
Once you’ve evaluated your space, it’s time to consider how best to organize your equipment for maximum performance and comfort.
Functionality First
Your layout must not only facilitate movement but also be safe. Make sure the area is clear and you have enough swinging room. Allow plenty of space around hitting mats and nets to avoid collisions. If you are using a projector and screen, be sure it does not get in the way of your swing path.
Lighting Sets the Mood
Lighting can be critical for seeing and the mood. Natural light is best, but artificial lighting does the trick, too. If you’re using a projector, pick a space with minimal glare to help your visuals be clear. Dimmer switches or LED panels that can be adjusted provide you with control over the atmosphere.
Flooring Matters
Following the flooring in your golfing area will also play a vital role with regards to comfort and durability. Concrete and hardwood floors are hard on your joints and can lead to erratic bounces off balls. Rubber mats or turf-like flooring can be installed to cushion impact and simulate an outdoor environment.
Decor Adds Flair
Finally, furnish your home with style. Incorporating golf-themed decorations — framed posters of prestigious courses or luscious greenery that recalls fairways — also helps complement the experience. A beautifully designed space not only feels inviting but inspires you to practice regularly.
With enough planning for your space, you will lay the groundwork for a successful indoor golf setup.
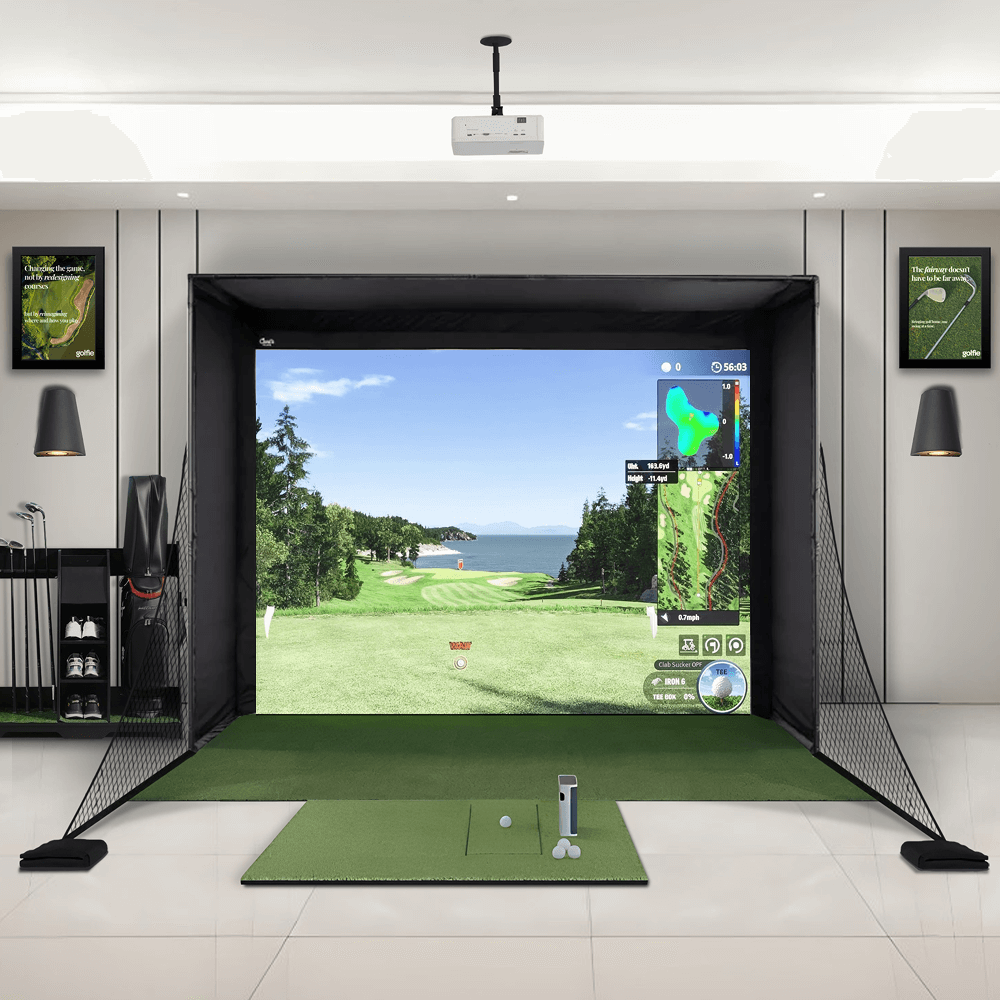
Basic Gear Needed for Your Indoor Golf Setup
Now that you have planned your space, it’s time to choose the equipment that will make your indoor golf setup truly spring to life. From a high-tech gadget for tracking your progress to a practical accessory that will make your practice experience more enjoyable, each piece is essential to a functional practice. Let’s unpack the basics.
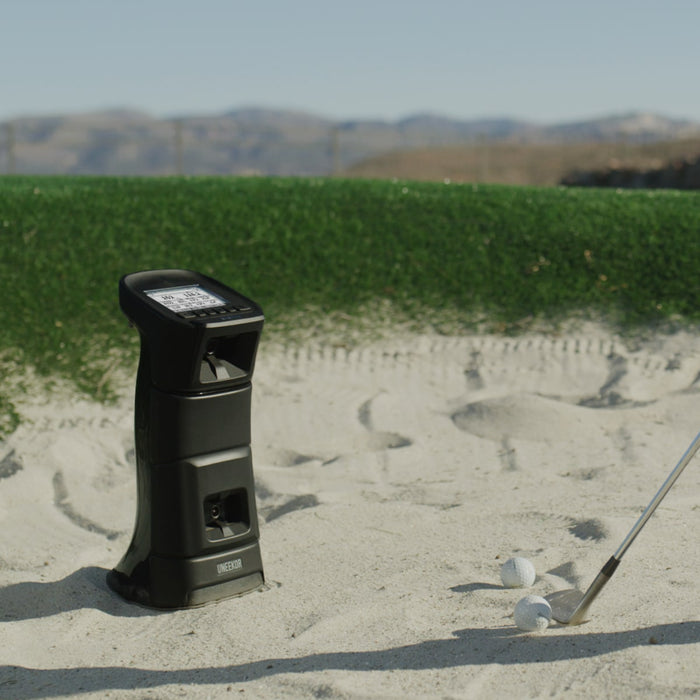
Launch monitors and simulators

The centerpiece of an indoor golf setup is the technology that measures and analyzes your shot. Launch monitors measure what happens at impact, tracking data points like ball speed, launch angle, spin rate, and club path. These devices provide the raw data that helps you understand your swing.
Golf simulators combine launch monitor data with software to create virtual golf experiences, allowing you to "play" virtual rounds on simulated-meet-reality courses, and visualize ball flight, making practice feel more interesting.
In this article, we will explore how these devices work and the best ones for tracking these key metrics at different price points.
Camera vs Radar Systems
Camera-based (photometric) launch monitors use high-speed cameras to capture images of the ball and club at impact. They are typically placed by the side of the golfer or overhead. Due to how they work, they require less space compared to radar systems and are better suited for indoor use where lighting conditions are ideal.
Radar-based systems, on the other hand, use Doppler radar to emit radio waves that bounce off the moving ball and clubhead. They are typically placed behind the golfer and are better suited for outdoor use as they are not affected by lighting conditions. They also require more space than camera-based systems, especially when used indoors.

Budget-Friendly Options
If you’re new to indoor golf or on a tight budget, there are plenty of inexpensive but reliable options out there:
-
SkyTrak: A top-level customer for amateur golfers, SkyTrak gained popularity within the industry for delivering accuracy in its measurements while keeping prices in a relatively low price range. It has detailed shot data and is compatible with a wide array of simulation software.
-
Rapsodo MLM: Rapsodo MLM is one of the most compact and portable devices, built for mobile. It doesn’t have all the bells and whistles, but it’s a solid entry-level option for casual players.
You can also check out our integrated golf simulator packages under $5,000.
High-End Systems
If you want something high-end in terms of precision and performance, here are some premium models to consider:
- Uneekor: This is a newer brand that has rapidly gained popularity in the golf simulator industry. The Korean-based company has 6 models, the EYE XO, EYE XO2, QED, EYE MINI and EYE MINI LITE launch monitors with the QED and EYE XO models being overhead units that use a mixture of high-speed cameras and infrared technology to capture club and ball data.
- TrackMan: Considered the gold standard in the industry, TrackMan provides unmatched accuracy and in-depth data. It is popular with both touring professionals and serious enthusiasts. However, it is important to note that because Trackman uses radar to track golf balls, it requires significantly more space for you to get the best out of it.
-
Foresight Sports GCQuad: This quadroscopic launch monitor gets data from four super-high-speed cameras for a whole lot of detail. Allied with reliability and versatility, it is a pick of choice for discerning users.
You can also check out our integrated golf simulator packages in the $5,000-$10,000 range and the $10,000-$15,000 range.
Factors to Consider
Consider the following factors when selecting a launch monitor or simulator:
-
Accuracy: Terminate with consistent and reliable readings over multiple shot types.
-
Features: Does it provide video analysis, course simulations or the ability to play multiplayer?
-
Compatibility: The system should integrate seamlessly with your other equipment and fit within available space.
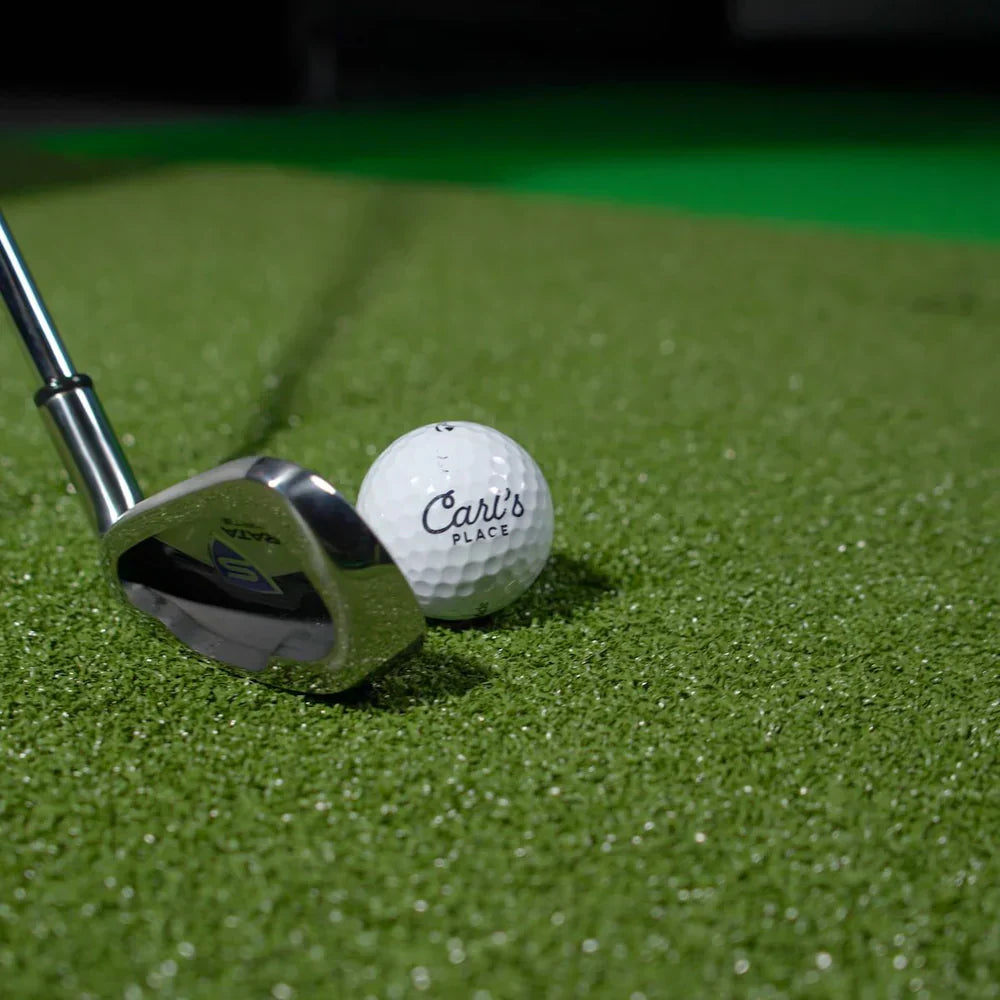
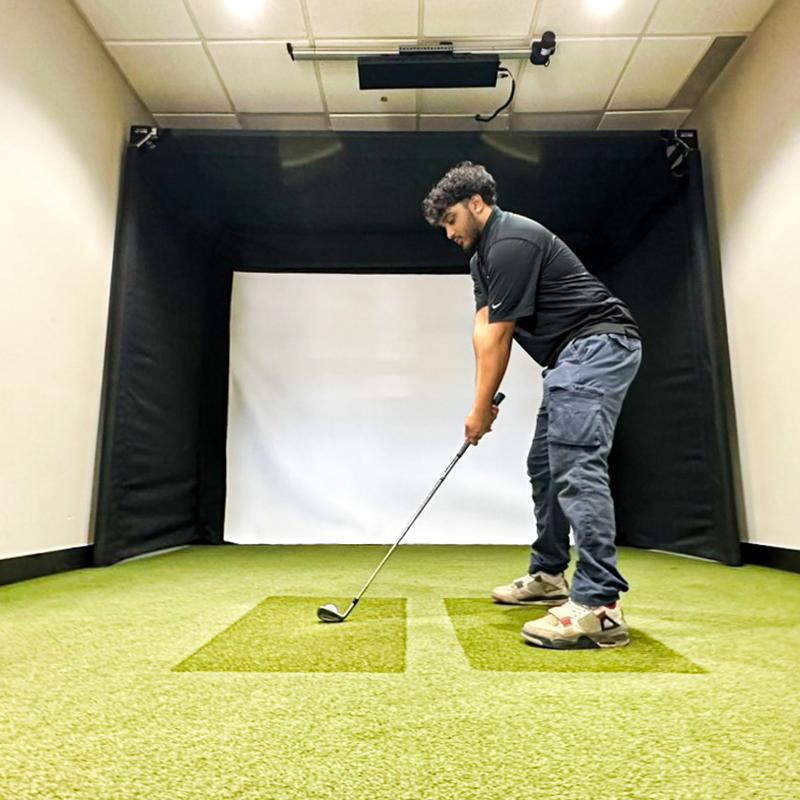
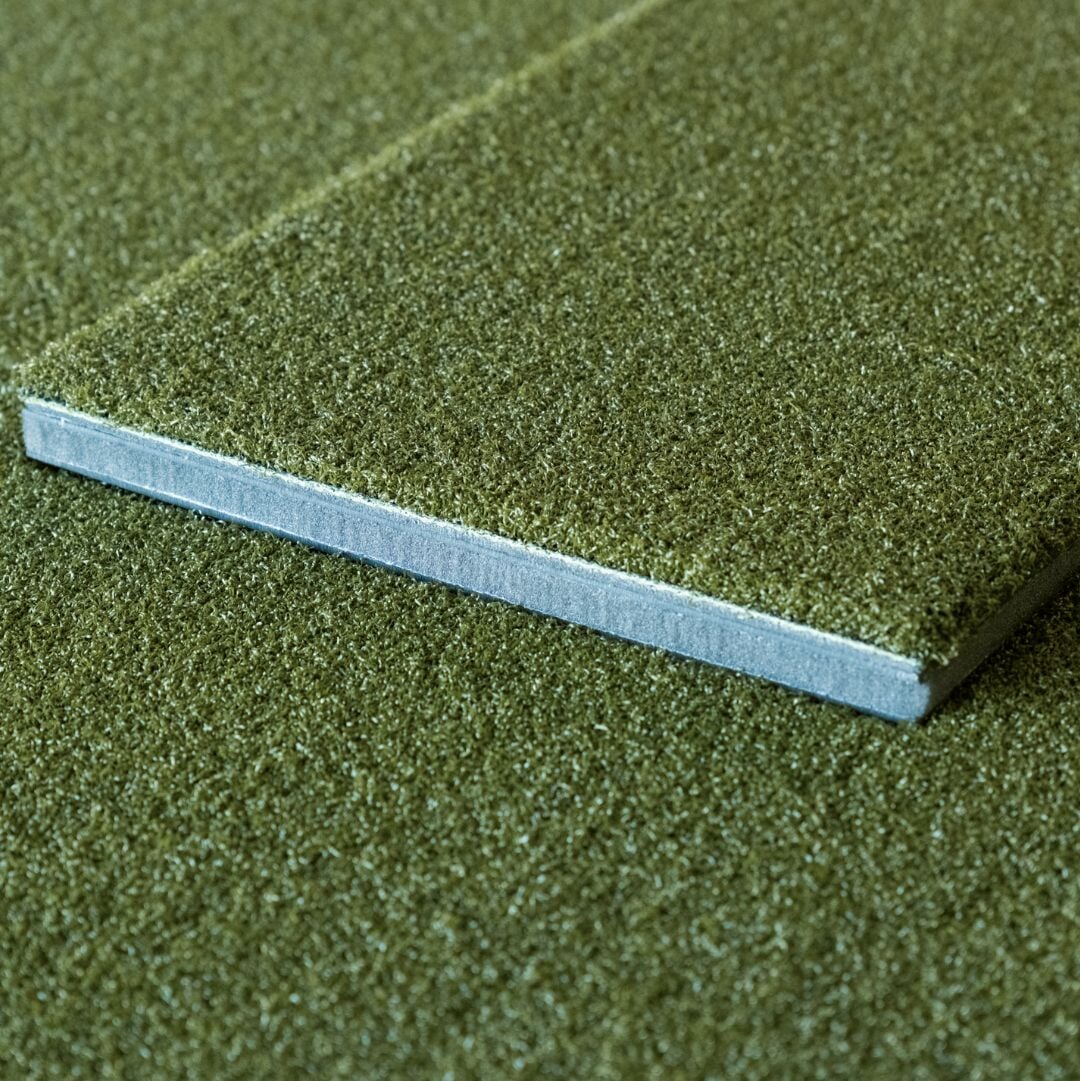
Hitting Mats and Nets

High-quality mats and nets protect your walls and provide a realistic hitting surface. These pieces are necessary for guidance and protection.
Quality Matters
Cheap mats of shorter durability can often provide the real grass feel but rarely succeed in it. Poor quality mats can also cause wrist and elbow injuries and provide unrealistic feedback. Instead, use high-density foam or synthetic turf products that reproduce the impact surface of outside. These premium mats lessen the strain on your joints while also providing accurate feedback for your shots. For more info, read our article on the impact quality golf mats have on improving your swing.
Quality Nets Save Lives

Having a solid net is essential for snagging wayward shots and protecting your property. Choose heavy-duty models designed for high-speed impacts and rated well for the speeds you'll generate. Durable fabrics and reinforced frames ensure that you get both longevity and peace of mind when using these frames. We recommend Spornia for entry-level options and The Net Return for more high-end options.
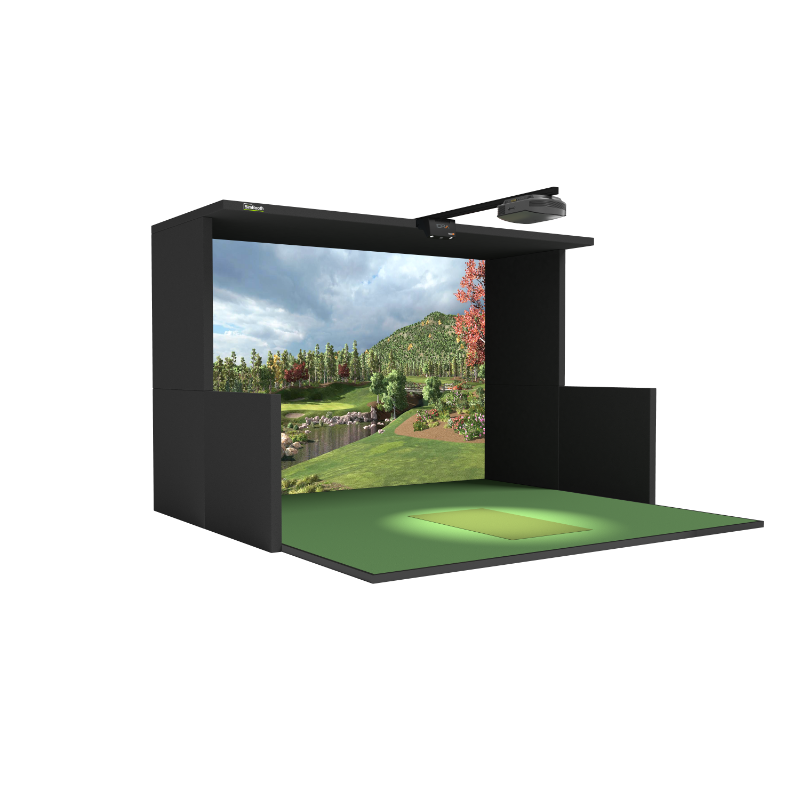
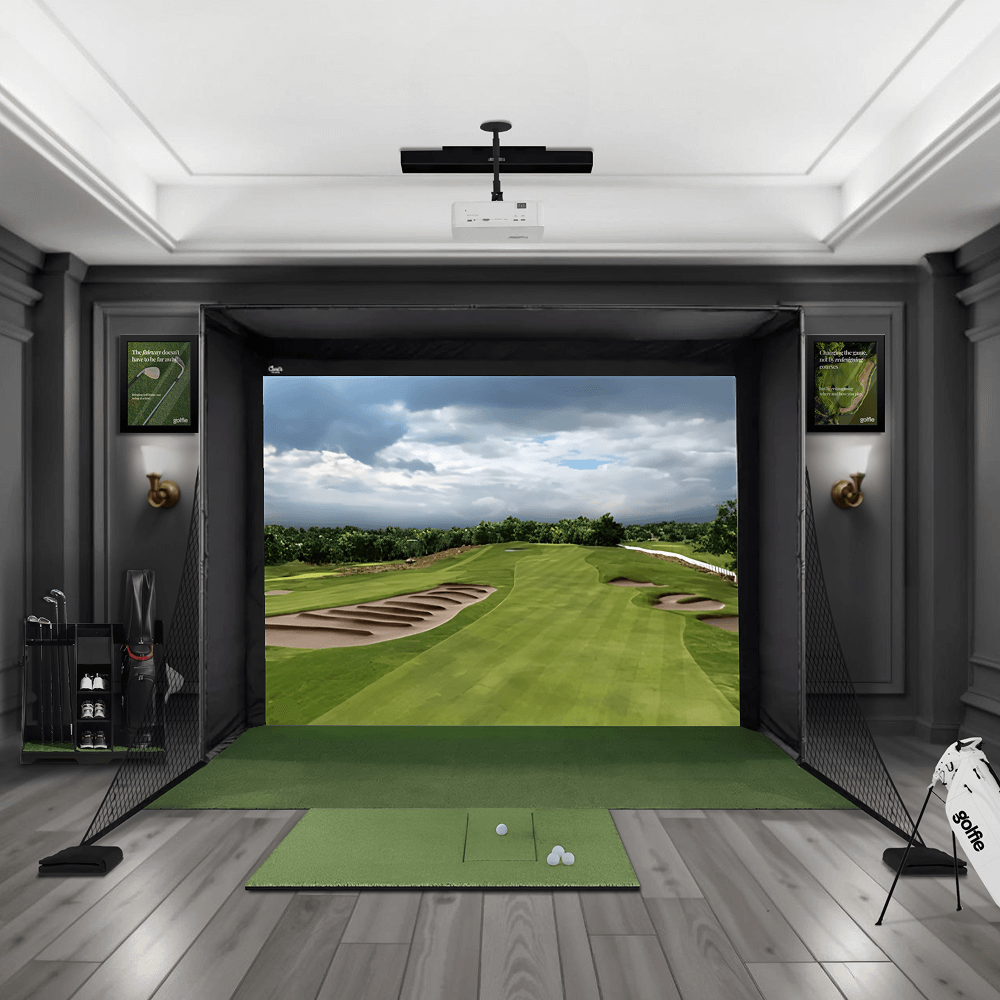
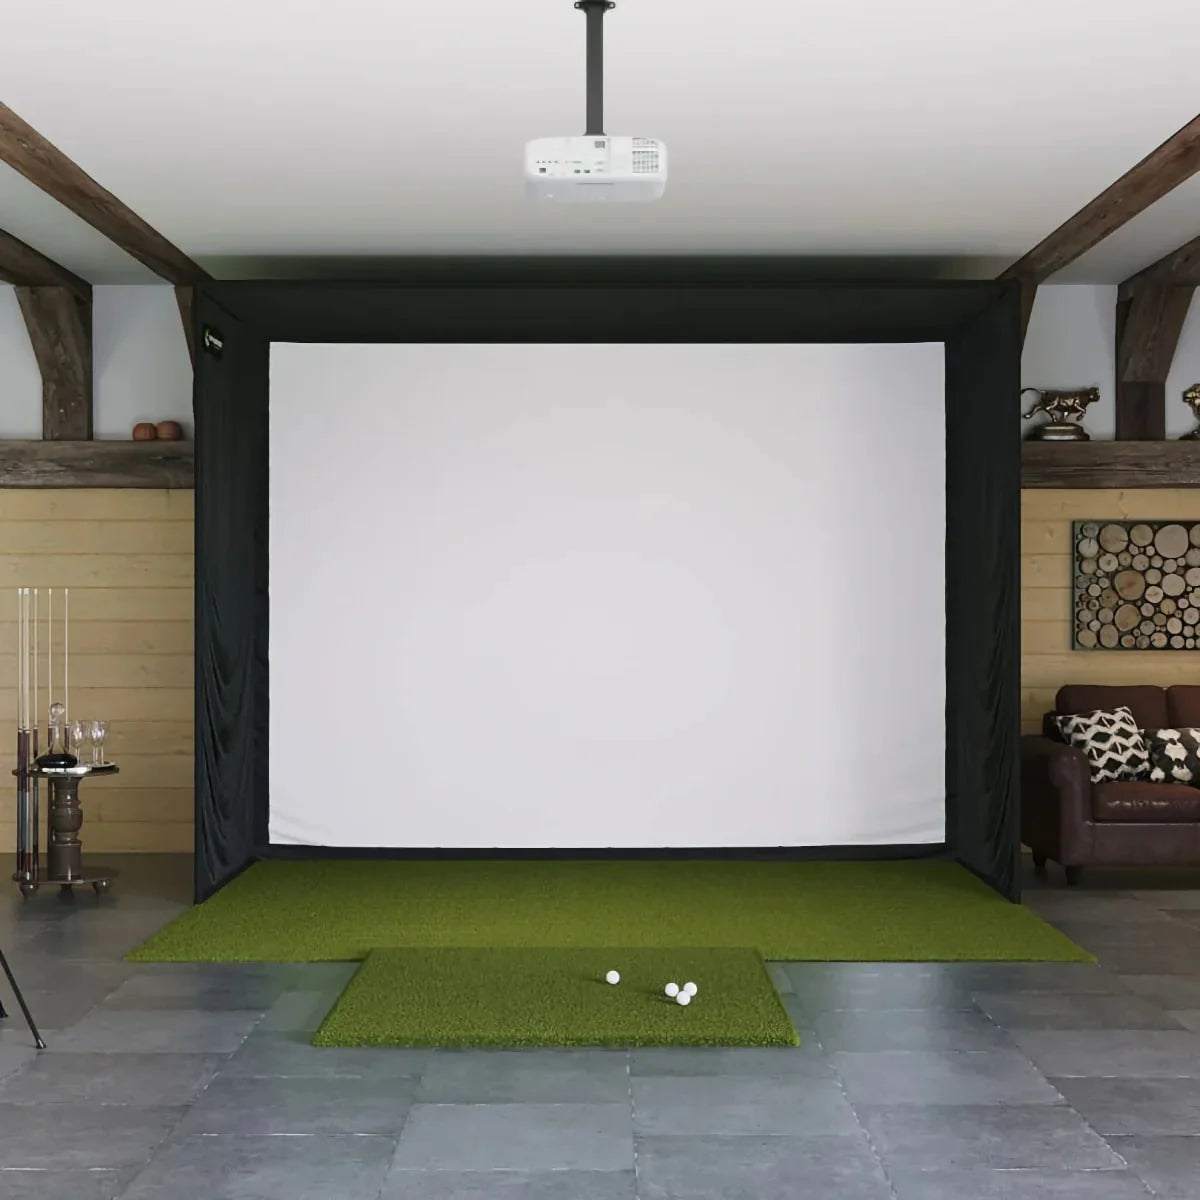
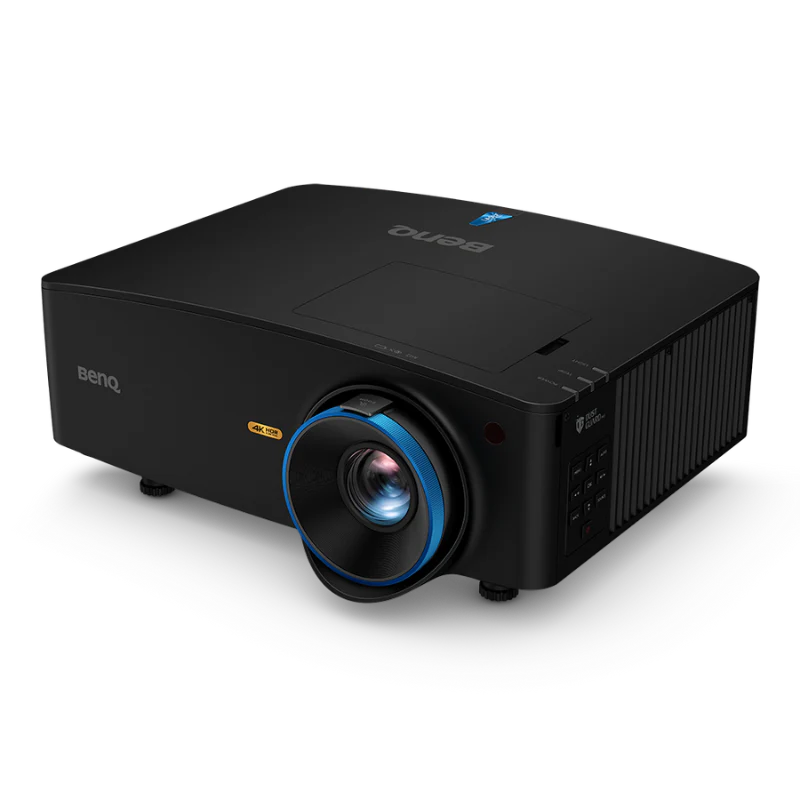
Projectors and Screens
For the ultimate in replication, use your launch monitor with a golf simulator projector and screen for an immersive experience. These two work together to create a virtual golf course experience in your very living room!
Projectors

Select a projector with high lumens so it can deliver bright, crisp images even in rooms that are not blacked out. For 4K models, the visuals are stunning, conveying courses as though they are actual ones being competed on.
Screens

Impact-resistant screens are built to withstand repeated impacts from a ball without tearing. Certain models offer a more curved design for a cinematic experience that draws you deeper into the action.
Putting Greens and Accessories
Full-swing practice is great, but don’t forget the short game. Your setup is incomplete without putting greens and other accessories.
Putting Greens

Indoor putting greens vary in size and texture. Choose one that simulates the roll and speed of actual greens. But massive installations could be both of small spaces and convenient portable options.
Other Accessories
Add tools to your practice:
-
Chipping Mats: Work on delicate chips and pitches indoors.
-
Hit Stick: getting a better posture through being able to aim.
-
Weighted Training Clubs: To gain strength and improve your swing mechanics.
With these essentials in hand, you have everything you need to establish a fully functional indoor golf setup.
Configuration & Calibration
Now that you have your equipment ready to go, it’s time to install and set up your indoor golf system, making sure everything runs smoothly.
Proper setup and calibration of your new simulator system is essential not only to ensure correct measurements and accurate results, but also to provide a smooth experience when operating your new system.
Installation Tips
Use these tips to quickly get your rig up and running:
Read the Manual
Make a careful read through the instructions that come with each piece of equipment. Knowing the manufacturer’s suggestions will help prevent blunders and ensure good working conditions.
Start Simple
Add one element, one component, one piece of data. Start with the hitting mat and net, then the launch monitor, projector, and screen.
Secure Everything
Make sure that everything is bound properly. Such accidents can be avoided by securing nets tightly, securely attaching screens, and placing mats on a non-slip surface.
Calibration and Testing
This is the process of adjusting your equipment in order to get accurate readings, also known as calibration. Follow these steps:
Follow Instructions
Built-in calibration procedures are included in most launch monitors. Follow the prompts closely to ensure maximum alignment.
Test Multiple Shots
Hit various shots — drivers to wedges — to confirm consistency. Monitor for inconsistencies in data and make changes to the settings accordingly.
Adjust as Needed
If some metrics look incorrect, double-check the calibration process or read the user manual for troubleshooting steps.
Both the installation and calibration of your equipment are processes that you will want to take the time to do properly, as doing so will enhance the effectiveness of your gear and extend its lifespan.
Maintenance and Upgrades
As with any type of investment, taking the time to properly maintain your indoor golf setup is important for ensuring optimal results and the longevity of your setup. Looking for upgrades can also keep your practice sessions fresh and gratifying.
Regular Maintenance
Regular maintenance keeps your equipment functioning at its best:
-
Clean Equipment: Dust off screens, wipe down mats, clean projector filters, and inspect nets for signs of wear.
-
Sensor Check: Regularly inspect launch monitors for calibration drift or faulty sensors
-
Software updates: Make sure to update the software of your launch monitors and simulators
-
Replace Parts: Replace worn or damaged mats or nets as soon as possible to ensure safety and athletic accuracy. Also, replace golf balls with significant signs of wear to avoid damaging your screens and nets.
Future Upgrades
As building the perfect indoor golf simulator equipment can be quite the financial investment, most golfers prefer to build their indoor setups incrementally. Here’s a tip on how you could go about this;
-
Start your setup with a quality mat and protective net. Add a low-tier launch monitor when you can. Add a projector or TV display subsequently, and then incorporate better simulator software.
Here are a few newer features you can consider adding to your setup as technology advances:
-
Better Tech: More accurate and functional (upgrade to a higher-end launch monitor).
-
Enhanced Capabilities: Multi-sport simulators or interactive training programs to ensure you do not lose your practice. Setups with AI-powered swing and putting analyzers will also do a lot to help you improve your game.
-
Better Visuals: Purchase a brighter projector or a larger screen to enhance your experience.
If you stay ahead with maintenance and are open to change, you will continue to enjoy the benefits of your indoor golf for years to come!
Final Thoughts
There is no one “perfect” configuration, though.
Customize your setup according to your goals, needs, and the resources you have. With commitment and attention to detail, you’ll quickly find yourself in a world where you can golf 365 days a year.
FAQs
What Are the Best Indoor Golf Flooring Options?
Hard surfaces, such as concrete or tile, are best as they’re both durable and easy to clean. But if you have a carpet or hardwood floor space, look into a protective mat or sports flooring made for this purpose. These alternatives protect your current floor and offer a more realistic experience when hitting off a mat. High-quality, realistic synthetic turf can be purchased in rolls from brands including ProTurf and Fairway Green and will make your practice sessions feel like the real thing!
What If I Already Have A Set Of Outdoor Clubs, Can I Use Them Without Any Adjustments Indoors?
Yes, you can use your outdoor clubs indoors without any alterations! However, you need to make sure that the system you set up is capable of accommodating the kind of clubs you want to use. A driver with a bigger clubhead, for example, may need more clearance due to the width of its swing arc.
Using proper mats for indoor hitting would avoid damaging your clubs and surroundings. Just be sure to wipe the grime off your clubs, because indoor areas can have the dust settle onto the club faces.
How Can I Avoid Noise Disturbing Others Who Live in My Home?
Noise control is often a big deal for indoor golf setups, particularly if you’re living in close quarters with family. The best solution for this ever a sound-absorbing panel installation on the walls and ceiling.
These panels help absorb echoes and minimize noise. Alternatively, rubberized hitting mats are relatively quiet since they absorb impact sound better than standard mats. Choose a room that has no or minimal shared walls such as a basement or garage if possible, to minimize disturbances even further.